2020 is a year that everyone will remember for different reasons, for me it meant cementing beautiful friendships that now mean the world to me and also reading more than I’d ever managed to read before. And today I thought I’d share my Top 20 books from the 49 books I managed to read in the last twelve months.

The Night Country by Melissa Albert is coming in at 20. This is the sequel to The Hazel Wood which I read last year. This follows Alice as she attempts to have a normal life after the events of the first book. Which is all well and dandy until fellow Stories start being murdered and she’s the prime suspect. I liked this book, more than I liked the first book but as a duology, I still wasn’t wowed. The build up, the murders and Alice losing grip on her life and her sense of reality were well written and had great premise however the ending much like The Hazel Wood was a little out of whack and felt rushed. It was a shame as it had so much potential and I really wanted to love the ending of this duology. Here’s hoping the companion Tales From The Hinterland isn’t as much of a let down.

Coming in at 19 we’ve got Thunderhead by Neal Shusterman. This is the second book in the Arc Of A Scythe trilogy and picks up right where the events of the first book left off. With Rowan gone rogue and acting As a vigilante, it’s up to Citra to try and end the corruption from within. Under the tutelage of Scythe Curie, Citra attempts every trick in the book but has to take a unpredictable leap of faith to get it to work. Oh how I loved Thunderhead. Well written, fast paced and packed full of twists and turns that you never see coming, this was the perfect follow on from Scythe.

Number 18 is The Vanishing Stair by Maureen Johnson. The second book in the Truly Devious trilogy, this carries on where Truly Devious left off. With a classmate dead and another missing, Stevie thinks she’s finally found the pivotal clue to solve the infamous Ellingham case from the 30’s when her parents pull her from the academy. But not for long, for one day slimy politician Edward King offers to help Stevie return in turn for her to play nice with his son David, someone who Stevie wishes desperately to avoid. This was the perfect continuation from the series. I’d waited months to read this book and i easily found myself lost in the world once again, not once struggling to pick the plot back up. I have the final book in the trilogy on my TBR for January and I’m excited to see how this trilogy ends.

Number 17 is The Beautiful by Renee Ahdieh. This was a Halloween read for me and I couldn’t get enough of it. It wasn’t bringing vampires back like i thought it was but damn it was good. It follows Celine who’s moved to New Orleans to start afresh and leave her past back in Paris. Generously taken in by the Ursuline Convent with six other girls, Celine soon finds herself enamoured with the city and with the underworlds most sought after gentleman, Sébastien Saint Germain. There’s sexual tension aplenty alongside murder and sprinkle of supernatural goodness. This book was slow to get off the mark but when it did it was incredible. The ending alone has me wanting The Damned to be released sooner rather than later and i can guarantee that it’ll be one of my favourite reads of 2021.

16 is The Merciful Crow by Margaret Owen’s spot. The first in a series this follows Fie a crow who’s job it is to ferry the dead to their final resting place. However that goes awry when her and her family go to retrieve the newly deceased Prince and his guard. Turns out their not dead, just using it as a ploy to escape the castle and work on saving their lands. This whole story is a journey, for the crew, for the prince but mostly for Fie as she learns to harness her magic and use it to save and protect the people she loves. This was a great book, I initially struggled to get into it but once i did i was lost in the world, hoping the best for the characters and screaming for the sexual tension to overflow. I honestly cant wait to read the sequel and see where Owen’s takes this series.

15 goes to Skyward by Brandon Sanderson. This follows Spensa who’s only dream is to follow in her father’s footsteps and become a pilot. There’s only one problem, a father is considered a coward and nobody is willing to give his daughter a chance. Yet there’s more to her fathers past than people are letting on and with Krell attacks on the rise, Spensa is even more adamant about following her dream and acing pilot school. This was my first Brandon Sanderson book and I was a little wary to begin with. I wasn’t sure if it would be my cup of tea but after the first few chapters, I was hooked and flew through this book. The world is beautifully fleshed out, the characters rag tag and flawed and the plot whilst slow in the beginning really gets going as soon as Spensa joins pilot school. Starsight, it’s sequel has been sat on my shelf since October and it’s safe to say it’s a sure one for my January TBR.

14 is The Doll Factory be Elizabeth Macneal. Set in late 18th Century London, this follows Iris who dreams of being a painter but is found as a doll maker alongside her twin Rose. Yet one day she catches the eye of Louis a painter who offers her a job as his model and muse. She agrees only if he teaches her to paint in his spare time. Yet becoming Louis model garners her the attention of Silas, a weird fellow who’s shop of abnormalities is his pride and joy. Silas soon becomes obsessed with Iris and things soon take a terrifying turn for her. This gave me major The Miniaturist vibes, with its slightly darker, almost creepy undertone.

13 belongs to Four Dead Queens by Astrid Scholte. This standalone YA fantasy novel follows Keralie, a thief and Varin a messenger who find themselves caught in a conspiracy that sees all four Queens of their land dead. This is a great standalone book, the world is built brilliantly without being too info dumpy and the characters are easy to like or dislike in some parts. The twist at the end when the killer is revealed is one a more seasoned reader would see coming a mile away but I still found shocking. I’d probably have liked to see this as a series, see the solving of each murder be a book alone but that’s just purely because I’d love to see more of where Keralie and Varin’s relationship could go.

2020 saw me read my first V.E. Schwab book which comes into this list at number 12. Vicious follows Victor and Eli; once college roommates and best friends now sworn enemies, after one fateful night at college saw Victor sent to prison for the next decade. But now he’s out and he wants revenge. If you’ve ever wanted to read the Renegades series by Marissa Meyer I’d say skip it and read this instead. This does superheroes, villains and superhumans in a gritty way that will have you hooked from the get go. Told in two different time periods, this gives you both a look into the past and what turned these boys against each other and how both are moving forward without being too confusing or hard to follow. And the way it sets up at the end means that I should probably read Vengeful before too much time passes.

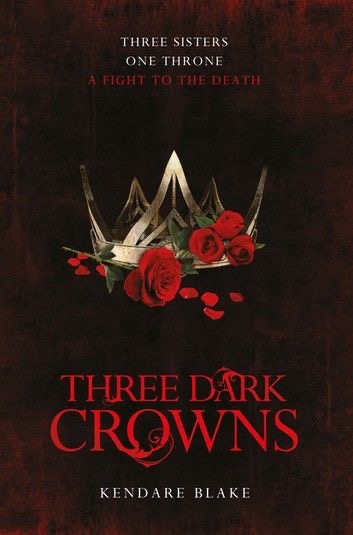
Just short of making the Top Ten is Three Dark Crowns by Kendare Blake. Number 11 tells the story of three princesses in training to take over the throne when they ascend at 16. However in order to claim their place on the throne, they must kill their two fellow sisters. This was well paced and easily developed each of the sisters without losing the general plot. The slight twists the kept coming towards the end and had me itching to pick up the second book, something I’ve still yet to do.

Number 10 is a bit of cheat because it’s both books in a duology but I loved it in its entirety I just had to feature them both in this countdown. The One Of Us Duology by Karen M. McManus is a YA thriller that will have you reading until the small hours. One Of Us Is Lying follows the murder case of a much hated student who dies under suspicious circumstances one detention, the four remaining students are the prime suspects and with secrets and lies being uncovered at every corner, it’s hard to decipher who the true killer is. One Of Us Is Next is set eighteen months after the first book and again follows the murder of a student who just happened to know too much about some of their fellow students. Both books had plot twists a plenty and were dripping in that stereotypical teen drama and revelation that most books and shows have. However in this case, it didn’t take away from the books, it just added a little something more to these twisty, fast paced thrillers. I highly recommend them to anyone who’s looking for a thriller, but one that isn’t as hardcore as some of the adult ones can be.

Another cheat comes in at No9. The Perfect Trilogy by Helena Duggan is just too darn perfect to feature just one book in this countdown. An incredible middle grade trilogy, I binged in a week follows Violet who moves to the small town of Perfect. From the outside it looks like the most welcoming place to live but after a few days, things start to change and it’s down to Violet and her newly acquired friend Boy to set the town free. I first read the first book in the trilogy back in 2019 and loved it so thought it’d be easy to read it again before I started on books two and three. I didn’t know then though that I’d be bingeing the whole series in a week and that it would one of my favourite series of the year. If you’re looking for some more middle grade books to read, I highly recommend this series, you won’t regret it.

Number 8 is a book that I should have read sooner but I’m glad I picked it up during the clusterfuck of year that was 2020. Ace Of Shades by Amanda Foody is the first in an incredible YA fantasy series set in the seedy city of New Reynes. Enne is looking for her missing mother and all she has is a name. Levi Glaisyer, an Iron Lord and a con man. Upon meeting Enne is thrown into the seedy lifestyle of New a Reynes and soon finds out more about her mother than she ever though possible. Throw in Levi’s debts and lies catching up for him and this first book is a rip roar ride that has you saying “saying just one more chapter”. I felt this was a little slow to start but soon picked up and before you know it the end is nigh and you’re desperate to read the sequel. I really should have read the sequel sooner but it’s definitely on my soon to read list.
Number 7 goes to Stalking Jack The Ripper by Kerri Maniscalco. I honestly don’t know why it took so long for me to read this. Set in 18th century London, and follows young Audrey Rose who wants nothing more to follow in her uncles footsteps in forensic science. Yet being a young lady of society, it’s heavily frowned upon until the infamous Jack The Ripper starts stalking the streets of London. From there it’s down to Audrey Rose and the extremely dashing Thomas to find the culprit before more people fall victim to the Ripper. I read this book so quickly, it just flew by. Each chapter had me hooked, each plot twist kept me reading and the reveal of the killer had me shocked. Between the suspense of the crimes and the chemistry between Audrey and Thomas, this was a sure fire win for appearing in this list.

There were two books in 2020 that shocked me with how much I enjoyed them, both I’d picked up on the whim and didn’t expect to love them as much as I actually did. The first of these is To Kill A Kingdom by Alexandra Christo. Lyra is a siren and has seventeen hearts buried in the sand under her bed. The eighteenth that she’s soon to collect will seal her fate as the most revered siren in the sea until she accidentally kills one of her own and is banished to live as a human. Things take a twist though when she meets Elian, a prince and the most feared siren killer to ever sail the ocean. Saved from drowning by Elian, Lyra soon finds herself sailing the ocean with the infamous siren killer and his rag tag crew as they hunt down the Prince’s Bane. But what they don’t know is that she’s closer than they think. I honestly didn’t think I was going to love this as much as I did. But I flew through it, the chemistry and the giant elephant in the room between Lyra and Elian, keeping me reading until it was way too late and I should have been in bed. I’d have loved to see this as a series but alas it’s a standalone with a ton of promise and an open ending.

We’ve reached the final five! Coming in at number five is Song Of Achilles by Madeleine Miller. This is an incredible retelling of the legend of Achilles, a infamous Greek hero with a tragic ending. However instead of being told from his POV, it’s told from the perspective of Patroclus, his long time friend and lover. As a fan of Greek mythology and history, this was everything I could ask for and more. Sure it was heavy on world building, battles and lengthy strategy meetings but it was also fast paced and dulled the shine of the hero worship an Achilles perspective would have given. Between this and Circe which I read back in 2019, this is definitely my favourite Madeline Miller book.

My second surprise of the year is probably the biggest reading surprise I’ve ever had. A Throne Of Swans tells the story of Aderyn who’s thrust into the role of Protector once her father dies. She’s expected to go to court and showcase her ancestral power of turning into a swan but she’s not been able to do so since she saw her mother murdered. With power hungry relatives looking to take over her kingdom, Aderyn must do everything in her power to change, to transform into a swan and prove herself the rightful leader of her kingdom. I honestly didn’t think I was going to even finish this book, let alone love it as much as I did. Yet I finished it in a mere three days and was over the moon to find out it had a sequel due to release this month. If you pick up a book from this list, I highly recommend it be this one.

I read a Cassandra Clare trilogy this year and it destroyed me. Book three to precise which coincidently comes in at number three on this list. Clockwork Princess is the third and final book in the Infernal Devices trilogy. The trilogy follows Tessa who comes to London in hopes of finding her brother but in fact finds herself caught up in the Shadowhunter world and torn between the charming Will and dashing Jem. This book made me cry, it made me shout, it made me throw it down in anger and surprise. I do not understand why it took me so long to read and finish this series. It’s my favourite of all Cassandra Clare’s series and if you were looking at reading a Cassie Clare series, this would be the one I’d advise starting with, you won’t be disappointed.
Number 2 is going to be a controversial choice but i don’t care as I absolutely adored it and think it closed the series off perfectly. Queen Of Nothing is the third and final book in Holly Black’s Folk
Of The Air trilogy. This closes off Jude and Cardan’s story perfectly. Sure it’s short and it may seem rushed but so much was built up in the first two books, it doesn’t require a thick, over written finale to tie it up nicely. I know I’m probably on my own loving it but I couldn’t care less, it was incredible and this cover is just breathtaking.

And finally in at Number One is one that shouldn’t surprise long time readers of this blog. Back in January of 2020 this book was all I could rave about. And now a year later, I’m still raving about it. A Heart So Fierce And Broken is the second book in the Cursebreakers trilogy. Set from Grey’s perspective, this follows his journey as he distances himself from Rhen and Harper, learning more about his birthright as his journey continues. This was even better than the first book, Grey is now my favourite character in this series and I can’t wait to see where book three takes him. I’m sad to think that A Vow So Bold And Deadly is the last in the series but I’m just grateful I brought and read A a Curse So Dark And Lonely in the first place.