Showing posts with label baking. Show all posts

Sunday, 4 October 2020

Recipe: Ghoulish Marbled Halloween Cupcakes


I love baking for Halloween, it allows me to be a bit more adventurous, so many ghouls and monsters that can easily be incorporated into bakes but sometimes its also nice to strip it back and keep it simple. And that’s what I’m sharing with you today. A simple cupcake recipe with a surprise centre all topped off with a graveyard grey buttercream that has just the hint of glitter in it. 

Ingredients 

For The Cupcakes

- 150g Stork

- 150g Caster Sugar

- 150g Self Raising Flour

- 2 Tsps Vanilla Extract

- 3 Eggs

- Orange Food Colouring

- Green Food Colouring

For The Buttercream

- 200g Butter, softened 

- 320g Icing Sugar

- 2 Tsps Vanilla Extract

- Black Food Colouring

- Jam, flavour of your choice

Method

  1. Pre heat oven to 180C. Line a twelve hole cupcake tin with paper cases. 
  2. Into a bowl place your caster sugar and stork. Cream together either by hand, electric mixer or stand mixer until it’s pale and fluffy in colour. 
  3. Add one egg and a tablespoon of flour. Beat until well combined and then repeat with your remaining eggs. 
  4. Fold in your flour and vanilla extract, taking time to slowly fold it through and keep all the air you’ve just beat into the mixture. 
  5. Now comes the fun part. Divide your mixture between two bowls. Into one bowl add your orange food colouring and mix until you’ve reached your desired colour. I used quite a lot of orange colouring as I wanted it to be quite bright. 
  6. In your second bowl add your green food colouring and again mix until you reach your desired colour. I had to mix two different greens for this recipe as the lighter green on it’s own had too much of a yellow undertone that the darker green turned slime coloured when added. 
  7. To marble the two together just alternate spooning the mixture into the waiting paper cases and pop in the oven for 20-22 minutes or until the top springs back when pressed. You could take a toothpick and marble them together before cooking but they automatically and organically do it when they bake so I always like to leave it to the oven to create my pattern. 
  8. Leave to cool in the tin for five minutes and then transfer to a wire cooling rack to cool completely. 
  9. Now its time to make your buttercream. Pop your softened butter into a clean bowl and beat until soft and pale in colour. I highly advise using a hand mixer or a stand mixer for this part as doing this by hand can be a killer. 
  10. Sift in half of your icing sugar and beat until fully incorporated. I tend to start off by folding my icing sugar in so it doesn’t fly out of the bowl and you’re don’t get that dreaded icing sugar cloud. 
  11. Sift in the remaining half of your icing sugar and vanilla extract and beat again. Take this time to really scrape the edges and the bottom of the bowl so there aren’t pockets of icing sugar left unmixed in your buttercream. 
  12. This is where it gets difficult. Adding food colouring to buttercream isn’t difficult but trying to create that perfect midnight black is. I used the Sugarflair Midnight Black food colouring to start with and it’s what’s given it that lovely metallic sheen but you may need to combine two shades of black to get there or even somewhere close. I also used the Dr Oetker Black Gel Food Colouring to achieve this colour which wasn’t what I was going for but still turned out well in the end. 
  13. Once you’ve gotten your desired colour, set your now prepared buttercream to one side. It’s time to add your secret centre. Take your now cooled cupcakes and using a knife or a corer cut out the centre. You could keep them to place on top once you’ve filled them or you could eat them as I did. 
  14. Take your jam and spoon a small amount into the middle of your cupcake. Using the back of your spoon gently press down so that your filling lies flat against the top of your cupcake. 
  15. Fit a piping bag with a nozzle of your choice and then fill it with your buttercream. Pipe your desired design onto your cupcakes. Don’t worry about your buttercream mixing with your jam, it’s all going to smush together when you bite it anyways.
  16. Then all that’s left is to enjoy. I love the metallic sheen these have and when you bit into them you get that delicious sweet vanilla alongside the sharp, tart taste of the jam. Trust me whoever you bake these for is going to love them. 

Wednesday, 16 September 2020

Recipe: Dark Chocolate And Orange Shortbread


I love shortbread, love cooking shortbread and love thinking of new flavour combinations to try out in my shortbread recipes. And earlier in the year I shared a recipe for triple chocolate shortbread that created my addiction for shortbread with chocolate chips in. So with Autumn upon us and Christmas rapidly approaching, I thought I’d try and incorporate one of my favourite Autumn/Winter flavours into shortbread. So today I’m sharing with you my dark chocolate and orange shortbread thar’s rich, sharp and melt in the mouth delicious. The key to this shortbread is dark chocolate chips, their slightly bitter flavour combines perfectly with the sharpness of the orange and creates a delicious combination in each bite.

Ingredients 

- 115g Butter

- 55g Caster Sugar 

- 175g Plain Flour 

- 100g Dark Chocolate Chips

- Pinch Of Salt

- Zest Of One Orange

- Juice Of Half An Orange 

Method

  1. Pre heat oven to 180C. Line a tin of your choosing with greaseproof paper.
  2. Into a bowl place your caster sugar, plain flour and salt.
  3. Add your butter and then using your fingers or a food processor blitz/rub together until it resembles breadcrumbs. 
  4. Add your dark chocolate, orange zest and orange juice. Continue rubbing together until it starts to resembles a dough. Normally I’d add a little bit of water to my mix to help bind it all together but because we’ve added the orange juice, we don’t need that extra help to bind everything together. 
  5. Once you have your dough, you can either roll it out on a lightly floured surface and cut out with a cutter of your choice or you can press it into a small tin that’s lined with greaseproof paper like I do. 
  6. Once your shortbread is ready, pop it into the oven and let it bake for 10-15 minutes or until the edges are golden brown. 
  7. Leave to cool completely in the tin if you’ve cooked it as a whole and then cut and enjoy or if you have shaped shortbread just gently peel it from the greaseproof and enjoy. These work wonderfully with a nice cuppa and one bit won’t be enough. 

Monday, 14 September 2020

Recipe: Pumpkin Spice Shortbread


I think it’s safe to say that I’m a little obsessed with pumpkin spice, even though I’m yet to have a PSL so far this year. So today I’ll be sharing with you my recipe for Pumpkin Spice Shortbread. Rich and buttery, this crumbly shortbread embodies all the flavours of Autumn whilst still melting in the mouth and being absolutely delicious. 

Ingredients 
- 115g Butter
- 175g Plain Flour 
- 55g Caster Sugar
- Pinch Of Salt
- 2 Tsps Pumpkin Spice Mix 

Method 
1- Pre heat the oven to 180C. Line a tin of your choosing with greaseproof paper. This can be a round sandwich tin like I used or a flat baking tray so you can roll and cut out your desired shape. 
2- Into a bowl place your plain flour, caster sugar and salt/ 
3- Add your butter and rub together until it resembles breadcrumbs. You can also use a food processor to do this but I don’t have one and find it quite satisfying to do with my fingers. 
4- Add your pumpkin spice mix and continue to rub together with your fingers until the mixture starts coming together to resemble a dough. You may require some water to get the dough to come together but you don’t want to add too much as it’ll make the dough too wet and it will just stick to the sides of the bowl. 
5- Now I planned on using some leave shaped cutters and being all Autumnal and that but my amazon order got lost in the post and I had to just pop my dough into my prepared round tin and bake it. You can use any cutter you like and just need to roll the dough out on a lightly floured surface before using your cutters to create your desired shape. Then it’s just a case of popping them onto your prepared tin and popping them into the oven for 10-15 minutes or until the edges are golden brown. 
6- Once your shortbread is cooked, leave it to cool in the tin completely. Then once it’s cooled all that’s left to do is cut it if you’ve cooked it in a tin like mine or just peel gently off the greaseproof paper and enjoy with a cup of coffee. 

Saturday, 8 August 2020

Recipe: Kinder Bueno Cupcakes


When me and my colleagues were deciding on what to do for our Saturday Boy’s 18th, we tossed around the idea of making him a cake or cupcakes. From there we argued what flavour would be best when I remembered that he loved Kinder Bueno’s (I mean who doesn’t?) and me being the Mary Berry of my store, was given the task of creating him something Kinder Bueno related. Of course I happily accepted it, I love any opportunity to bake and share my creations with people. I opted to make cupcakes as they were easier to transport, perfect and meant he had plenty to share with his family. 

Ingredients 
For The Cupcakes
- 150g Caster Sugar
- 150g Stork
- 150g Self Raising Flour
- 2 Eggs 
- 2 Tsps Chocolate Extract 
- 10g Cocoa Powder 
- 150g Nutella, melted 

For The Buttercream 
- 200g Butter, softened 
- 320g Icing Sugar
- 100g Dark Chocolate, melted
- Kinder Bueno Bars To Decorate 

Method 
1- Pre heat your oven to 180C. Line a twelve hole muffin tin with paper cases. 
2- Into a bowl place your caster sugar and stork. Cream together until pale and fluffy in texture. 
3- Add one egg and a tablespoon of flour. Beat until completely incorporated, scraping the sides and bottom of the bowl so nothing is left sat untouched. 
4- Repeat with your remaining egg and another tablespoon of flour. Again beat until fully incorporated.
5- Fold in your remaining flour, cocoa powder and chocolate extract. Take care to be gentle at this step, if you beat this into the mixture you’ll lose all the air you’ve just built up and you’ll end up with a flat, heavy cake. 
6- Fold in your melted Nutella. Again don’t beat this wildly into your mixture or you’ll lose all the air and these when folded correctly are the lightest, fluffiest cakes ever. 
7- Spoon your mixture into you prepared cases and bake for 18-20 minutes or until a skewer comes out clean. Once baked, leave to cool in the tin for five minutes and then transfer to a wire cooling rack to cool completely. 
8- Now it’s time for the buttercream. Into a clean bowl place your softened butter. Beat until it’s pale in colour and soft in texture. This could take a while so I advise using a stand mixer or a hand mixer for this part. 
9- Sieve in half of your icing sugar and beat until completely incorporated. If using a hand mixer or a stand mixer, start off on a slow speed as you don’t want to end up covering your entire kitchen in a icing sugar cloud. 
10- Sieve in the remaining icing sugar and again beat until you have buttercream. Remember to scrape the sides and bottom of the bowl as you go so nothing is left unmixed and lumpy in your buttercream. 
11- Fold in your melted dark chocolate, leaving no bit of buttercream unmixed. You could easily use milk chocolate or even just cocoa powder for this part but I wanted the icing to be really rich to blend nicely with the Nutella cupcakes. 
12- Spoon your buttercream into a piping bag fitted with a piping nozzle of your choice and pipe onto your now cooled cupcakes. Once you’ve piped your icing onto your cupcakes, place either a chunk or two chunks (your choice) on top of your cakes. Once the entire batch is iced and decorated, leave to set before sharing with whoever you decide to share them with. 

Tuesday, 4 August 2020

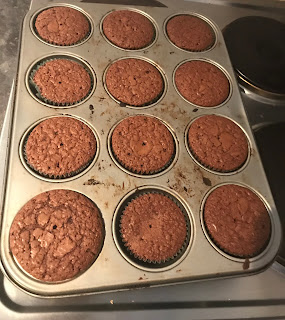
Recipe: Simple Nutella Cupcakes


First of all please excuse the less than professional picture, the idea to post these as a separate recipe before decoration only came to me as I took them out of the oven. These simple Nutella cupcakes are the base for a Kinder Bueno cupcake that I’m baking for my colleagues 18th birthday. However seeing how well this quickly put together, hastily judged recipe turned out, I thought I’d share it with you all. Shall we get into it. 

Ingredients 
- 120g Stork
- 120g Caster Sugar 
- 120g Self Raising Flour 
- 120g Nutella, melted 
- 2 Tsps Cocoa Powder 
- 2 Tsps Chocolate Extract 
- 2 Eggs 

Method 
1- Pre heat your oven to 180C. Line a twelve hole with paper cases. 
2- In a bowl place your stork and caster sugar. Cream together until pale and fluffy, easily achieved with a stand mixer or by hand. 
3- Add one egg and a tablespoon of flour. Beat thoroughly until combined, taking time to scrape the sides of the bowl. 
4-Repeat with the second egg and a second tablespoon of flour. Beat again until combined, making sure everything is incorporated and not left sitting on the sides of bottom of the bowl. 
5- Fold in your remaining flour, cocoa powder and chocolate extract. Folding these ingredients helps to keep the air in your mixture, creating a light, melt in the mouth cake that you won’t be able to get enough of. 
6- Fold in your melted Nutella, you’ll notice that the mixture will darken and become looser in consistency but that’s totally fine. You don’t have to melt your Nutella before you add it to the mixture but  melted it does help with its incorporation. 
7- Spoon your mixture into your prepared paper cases and cook for 20-22 minutes or until a skewer comes out clean. You can also do the press test and if the top springs back then their ready to come out. Due to the cocoa powder and Nutella in the mixture, these don’t take as long to cook as other cake mixture do. 
8- Leave to cool in the tin for five minutes and then transfer to a wire rack to cool completely. 
9- All that’s left then is to enjoy them. And what may be one could easily turn into two or three as these are deliciously moreish. 

Saturday, 30 May 2020

Recipe: Lemon And Lime Sandwich Cake

Since I was a kid I’ve always loved the flavours lemon and lime combined. From squash to marmalade I had it all in lemon and lime. And even now as I’ve “grown up” I still love the combination. Last year I shared my recipe for lemon and lime cupcakes which my friend Debs still talks about to this day but I was still on the lookout for adding another lemon and lime recipe to my repertoire. A loaf cake was out straight away as mine have a horrible tendency to sink in the middle and it wouldn’t suit a shortbread or cookie recipe. So I decided to take a classic and give it a slight twist. So today I bring you my Lemon And Lime Sandwich Cake which consists of two light lemon flavoured sponges, sandwiched together and decorated with lime buttercream, with lemon and lime zest sprinkled over top.

Ingredients
For The Sponges
- 200g Caster Sugar
- 200g Self Raising Flour
- 200g Stork
- 4 Eggs
- Zest Of 2 Lemons

For The Buttercream
- 200g Butter, softened
- 320g Icing Sugar
- Zest Of 2 Limes
- A Splash Of Milk
- 1Tsp Lime Juice (optional)
- Extra Zest To Decorate (Lemon & Lime)

Method
1- Pre heat your oven to 180C. Grease and line two 19cm sandwich tins with greaseproof paper.
2- Into your bowl place the stork and caster sugar. Cream together until pale and fluffy in texture.
3- Add one egg and a tablespoon of flour. Beat until fully combined.
4- Repeat with your remaining eggs, adding a tablespoon of flour after each egg. Beat each time until every thing is incorporated, remembering to scrape the sides of the bowl as well.
5- Fold in the rest of your flour and lemon zest. Slow and steady is the best way at this part. You don’t want to beat the hell out of the mixture as it’ll knock out all the air you’ve already created and you’ll end up with a dense cake that is hard to chew and is more likely to sink when cooling.
6- Split the mixture evenly between your two prepared tins and cook for 18-20 minutes or until golden brown and springy to the touch. Leave to cool in the tins for five minutes, then gently remove them from the tins and leave to cool completely on a wire cooling rack.
7- Now it’s onto the buttercream. Place your softened butter into a clean bowl and beat until soft and pale in colour. A hand mixer or a stand mixer are the best for this as it takes a while and will give you horrific arm ache if you attempt it by hand.
8- Sieve in half of your icing sugar and beat until fully incorporated.
9- Sieve in the remainder of your icing sugar and beat again until combined. Take your time to scrape the sides of your bowl down so there are no pockets of icing sugar or butter sat on the sides.
10- If your buttercream is a little stiff add your splash of milk and lime zest now. Beat until it’s a pipable consistency, adding a little more milk if necessary.
11- Now this next step is optional but I added a little bit of lime juice to my buttercream to give it more of a kick. You don’t have to add it if you don’t want to but it’s a good way of adding a bit of punch if you like that stronger flavour.
12- Spoon your buttercream into a piping bag fitted with a nozzle of your choice and decorate however you choose. I used my trusty 2D Nozzle to create this mini flower-esque pattern both to sandwich them together and to decorate the top. It’s a nice way to give the middle, sandwich section a prettier look, especially from the sides.
13- Once you’ve decorated your cake sprinkle over your remaining lemon and lime zest. Leave to one side to set or cut a nice big slice straight away. It smells heavenly, looks divine and tastes scrumptious so it’s guaranteed to be a hit with family, friends and work colleagues.

Wednesday, 27 May 2020

Recipe: Strawberry Cupcakes

As the weather has taken a warmer turn, I've been craving strawberries more and more. Then I decided to make my nan a surprise cake but then realised that a two layer Victoria Sponge cake would be too much for her to eat on her own. So I turned them into cupcakes and they surprisingly turned out better than I expected. A light vanilla sponge with freeze dried strawberry pieces folded through topped with vanilla buttercream and a sliced fresh strawberry.

Ingredients 
For The Cupcakes
- 100g Caster Sugar
- 100g Stork
- 100g Self Raising Flour
- 2 Eggs
- 2 Tsp Vanilla Extract
- 30g Freeze Dried Strawberries

For The Buttercream 
- 200g Butter, softened
- 320g Icing Sugar
- 2 Tsp Vanilla Extract
- A splash of milk
- A dozen strawberries sliced in half

Method
1- Pre heat oven to 180c. Line a twelve hole cupcake tin with paper cases.
2- Into a bowl place your caster sugar and stork. Using either a wooden spoon, spatula, hand mixer or stand mixer cream together until it's become soft, pale and fluffy in texture.
3- Add one egg and a tablespoon of flour. Beat until fully combined.
4- Repeat with the second egg and another tablespoon of flour. Beat until combined, taking care to scrape the edges of the bowl so that nothing is left sat on the sides.
5- Fold in your vanilla extract alongside the remainder of your flour. Take care when folding everything together as you don't want to knock out any of the air that you've already added to the mixture.
6- Spoon into your prepared cases and bake for 18-20 minutes or until the top bounces back when pressed gently. Leave to cool in the tin for five minutes before transferring to a wire cooling rack to cool completely.
7- Now it's time to start the buttercream. Place your softened butter into a clean bowl and beat until soft and pale in colour. I highly recommend using a hand mixer or a stand mixer for this part as it can take a while for it to reach the right consistency.
8- Sieve in half of your icing sugar and beat until it's fully combined.
9- Sieve in the other half of your icing sugar and beat until combined. Once everything is combined you can add a splash of milk to your buttercream to loosen it slightly so it's at an easier piping consistency.
10- Beat in your vanilla extract and take your time to scrape around the edges and bottom of the bowl so that there are no pockets of butter or icing sugar sitting there.
11- Spoon into a prepared piping bag fitted with a nozzle of your choice and pipe the buttercream onto your now cooled cupcakes. I used my trusty 2D Flower Nozzle that creates the perfect yet effortless swirl but you can use any piping tip you like.
12- When you've applied buttercream to all of your cupcakes, place your sliced strawberry half on top and leave to set. I highly advise putting these into either an airtight container or into the fridge what with having fresh fruit on top and all.
13- Then all that's left is to enjoy them. Mine went down a treat with my nan, family and work colleagues so I can guarantee all your friends and family will love them as well.

Friday, 22 May 2020

Recipe: Malteaser Cupcakes

Malteasers are some of my favourite chocolates and for the longest time I wanted nothing more than to devour a family box to myself. Yet I refrained from doing so and I chose to make easy Malteaser cupcakes that have a delicious malty kick to them. A light malt/chocolate sponge is topped with a malt and chocolate buttercream with Malteasers on top to decorate.

Ingredients 
For The Cupcakes 
- 100g Light Brown Sugar
- 100g Stork
- 100g Self Raising Flour
- 15g Cocoa Powder
- 10g Malt Powder
- 2 Eggs
- 2 Tsp Chocolate Extract

For The Buttercream 
- 200g Butter, softened
- 320g Icing Sugar
- 15g Cocoa Powder
- 10g Malt Powder
- A splash of milk
- 1 Share Box/Bag Of Malteasers

Method 
1- Pre heat your oven to 180c. Line a twelve cupcake tin with paper cases.
2- Into a bowl place your light brown sugar and stork. Cream together until pale in colour and fluffy in texture.
3- Add one egg and a tablespoon of flour. Beat until combined.
4- Repeat with the other egg and another tablespoon of flour. Beat until fully combined, taking care to scrape the edges of the bowl.
5- Fold in your chocolate extract, cocoa powder and malt powder alongside the remainder of your flour. You can use any type of malt powder, I used Ovaltine as that's all I had but you can easily use Horlicks and if you want to add even more chocolate use the chocolate alternative to both of these.  6- Spoon your mixture into your waiting cupcake cases and bake for 18-20 minutes or until the top springs back when pressed gently. Leave to cool in the tin for five minutes before transferring to a wire cooling rack to cool completely.
7- Now it's time to start your buttercream. Place your softened butter into a clean bowl and beat until soft.
8- Sieve in half your icing sugar and beat until combined. If you're using a hand mixer to make your buttercream, start on a slow speed so your icing sugar doesn't fly everywhere because it coats everything and doesn't taste as good as it suggests.
9- Sieve in the remaining half of your icing sugar and beat until fully combined, taking care to scrape the edges and bottom of the bowl so everything is fully incorporated.
10- Beat in your cocoa powder, malt powder and a small splash of milk to help loosen the mixture and take it to the perfect piping consistency.
11- Spoon your prepared buttercream into a piping bag fitted with a piping nozzle of your choice and pipe onto your now cooled cupcakes. I used my 2D Flower nozzle to create these swirls as it always works wonders with my shaky, still somewhat amateur piping hands.
12- Once all of your cupcakes have been decorated, gently place your malteasers in the centre to create a small cluster. I went for two in the centre so that they didn't roll off or make the cupcake look overloaded but you can put as many malteasers on as you like.
13- Leave to set and then enjoy. I can guarantee these will be a hit with family, friends and work colleagues.

Wednesday, 20 May 2020

Recipe: Terry’s Chocolate Orange Egg Cupcakes

When I saw that Terry's were doing Chocolate Orange Eggs this year I may have done a dance of joy. Terry's Chocolate Orange is one of my favourite chocolates to eat and to have it now in mini egg form was even better than I expected. Yet it took me up until Easter to actually try one and damn they are tasty so I just had to incorporate them into a recipe. A moist chocolate orange sponge is topped with a light chocolate orange buttercream finished off with a small cluster of eggs in the middle.

Ingredients 
For The Cupcakes 
- 100g Caster Sugar
- 100g Stork
- 100g Self Raising Flour
- 25g Cocoa Powder
- 2 Eggs
- 2 Tsp Orange Extract 
- 2 Tsp Chocolate Extract

For The Buttercream 
- 200g Butter, softened
- 320g Icing Sugar
- 2 Tsp Orange Extract
- 10g Cocoa Powder 
- A splash of milk
- 1 Bag Of Terry's Chocolate Orange Eggs

Method 
1- Pre heat your oven to 180c. Line a twelve cupcake tin with paper cases.
2- Into a bowl place your caster sugar and stork. Cream together until pale in colour and fluffy in texture.
3- Add one egg and a tablespoon of flour. Beat until combined.
4- Repeat with the other egg and another tablespoon of flour. Beat until fully combined, taking care to scrape the edges of the bowl.
5- Fold in your chocolate extract, cocoa powder and orange extract alongside the remainder of your flour. I always use two teaspoons of liquid chocolate extract when I make any kind of chocolate sponge. It helps to stop the cocoa powder catching as the cake cooks and gives it a delicious rich flavour whilst helping the cake stay moist even if you do accidentally leave it the oven a couple of minutes longer than you should.
6- Spoon your mixture into your waiting cupcake cases and bake for 18-20 minutes or until the top springs back when pressed gently. Leave to cool in the tin for five minutes before transferring to a wire cooling rack to cool completely.
7- Now it's time to start your buttercream. Place your softened butter into a clean bowl and beat until soft.
8- Sieve in half your icing sugar and beat until combined. If you're using a hand mixer to make your buttercream, start on a slow speed so your icing sugar doesn't fly everywhere because it coats everything and doesn't taste as good as it suggests.
9- Sieve in the remaining half of your icing sugar and beat until fully combined, taking care to scrape the edges and bottom of the bowl so everything is fully incorporated.
10- Beat in your orange extract, cocoa powder and a small splash of milk to help loosen the mixture and take it to the perfect piping consistency.
11- Spoon your prepared buttercream into a piping bag fitted with a piping nozzle of your choice and pipe onto your now cooled cupcakes. I used my 2D Flower nozzle to create these swirls as it always works wonders with my shaky, still somewhat amateur piping hands.
12- Once all of your cupcakes have been decorated, gently place your Terry's eggs in the centre to create a small cluster. You can use four or even five but I used only three to keep it looking cleaner and simpler but still ridiculously tasty.
13- Leave to set and then enjoy. I can guarantee these will be a hit with family, friends and work colleagues.

Monday, 18 May 2020

Recipe: Jelly Chick Cupcakes

When I said that I had a lot of recipes to post, I wasn't joking. Today I'm back with my third recipe which again I made back during the Easter period. Now these have Jelly Chicks on them but can easily be replaced by standard Jelly Babies. These went down a storm with my work colleagues when I took them in and I'm sure I'm going to be making these a lot more in the future.

Ingredients 
For The Cupcakes 
- 100g Caster Sugar
- 100g Self Raising Flour
- 100g Stork
- 2 Eggs
- 2Tsps Vanilla Extract

For The Buttercream 
- 200g Butter, softened
- 320g Icing Sugar
- 2 Tsps Lemon Extract 
- 1 Pack Of Jelly Chicks/ Jelly Babies
- Dr Oetker Orange Gel Food Colouring 

Method
1- Pre heat your oven to 180C. Line a twelve hold cupcake tin with paper cases.
2- Into a bowl place your caster sugar and stork. Cream together until pale and fluffy using either a spatula or a stand mixer.
3- Add an egg and a tablespoon of flour and beat until combined.
4- Repeat with your second egg and another tablespoon of flour. Beat until combined, taking time to scrape the sides of the bowl so everything is fully incorporated.
5- Fold in the rest of your flour and vanilla extract, taking time to add more air into the mixture instead of knocking it out. The air you add in now will help to create a light, fluffy cupcake that almost melts in the mouth.
6- Spoon into your prepared cupcake cases and bake for 18-20 minutes or until the top springs back when pressed.
7- Once the cupcakes are cooked, leave to cool in the tin for five minutes and then transfer to a wire cooling rack to cool completely.
8- Now it's time to start on your buttercream. Place your softened butter into a bowl and beat until pale and creamy. Your best bet is to use a hand mixer or a stand mixer as this can take a while to do and it's a lot easier on the arms.
9- Sieve in half of your icing sugar and beat until fully combined, taking to scrape the edges of the bowl so no clumps of icing sugar are left sat on the side.
10- Sieve the other half of your icing sugar into the mixture and beat again.
11- Now I added a little bit of lemon extract and orange food colouring but you can use any flavouring/colour combination you like. These needed to be beaten into the mixture alongside a splash of milk to take it to that perfect piping consistency.
12- Spoon your buttercream into a piping bag fitted with a piping nozzle of your choice. I went with a 2D Star Nozzle as it gives me a really nice swirl finish.
13- Once all of your cupcakes are iced, place your Jelly Chicks/Babies on top and leave to set so they don't fall off. Then all that's left is to enjoy them by yourself or shared with family or work colleagues.

Friday, 15 May 2020

Recipe: Mini Egg Brownies

I'm back again with another recipe. Now I baked this over Easter and whilst it may be long gone, I'm sure some of you have some emergency Mini Eggs lying around somewhere. These brownies are absolutely delicious, they're fudgy, rich and the mini eggs give it a delicious extra kick of chocolate. Perfect for anyone looking for a indulgent fix or just craving some mini eggs.

Ingredients 
- 275g Caster Sugar
- 90g Plain Flour
- 35g Cocoa Powder
- 200g Unsalted Butter
- 200g Dark Chocolate
- 3 Eggs
- 100g Dark Chocolate Chips
- 200g Chilled Mini Eggs

Method 
1- Pre heat your oven to 180C. Line a 9 inch brownie tin with greaseproof paper.
2- In a bain marie melt your dark chocolate and unsalted butter. You can melt the two together in the microwave but it does tend to catch and burn more than when it's done over a bain marie. Once everything has melted together, place to one side and leave to cool.
3- Into a bowl place your sugar and eggs. Using a hand mixer or a stand mixer, whisk until the mixture has doubled in size, has become pale in colour and has a mousse like texture.
4- Hopefully by the time it's taken to mix your egg and sugar mixture together, your chocolate/butter mixture will have cooled and you can gently fold the two together. Now you have to fold them together otherwise you'll knock out all the air that you've just beat into the egg/sugar mix.
5- Then it's time to fold in your plain flour, chocolate chips, cocoa powder and the majority of your mini eggs, keeping some to the side to press into the top before baking. Folding it all in together means that your mini eggs and chocolate chips are less likely to sink to the bottom and you don't run the risk of overmixing the mixture.
6- Pour into your prepared tin, using a spatula to spread it out evenly in the tin. Press your remaining mini eggs into the top of the mixture and bake for 30-35 minutes or until a skewer comes out clean. I'd advise chilling your mini eggs before you add them to your mixture/press into the top as it stops the colour from fading as they bake and makes them less prone to cracking as they cook.
7- Once they're cooked, leave to cool and set in the tin before cutting and enjoying. These last for a good three days if kept in an air tight container and are some of the most delicious brownies I've ever tasted (if I say so myself).

Tuesday, 12 May 2020

Recipe: Mini Egg Cupcakes

I love Mini Eggs and surprisingly still have a few packets knocking around my house even though Easter is long gone. So today I thought I'd share with you my recipe for easy Mini Egg cupcakes with a light moist chocolate sponge, fluffy vanilla buttercream, topped with a cluster of Cadbury's best creations.

Ingredients 
For The Cupcakes 
- 100g Caster Sugar
- 100g Stork
- 100g Self Raising Flour
- 25g Cocoa Powder
- 2 Eggs
- 2 Tsp Chocolate Extract

For The Buttercream 
- 200g Unsalted Butter, softened
- 320g Icing Sugar
- 2 Tsp Vanilla Extract
- A splash of milk
- 1 Bag Of Mini Eggs

Method 
1- Pre heat your oven to 180c. Line a twelve cupcake tin with paper cases.
2- Into a bowl place your caster sugar and stork. Cream together until pale in colour and fluffy in texture.
3- Add one egg and a tablespoon of flour. Beat until combined.
4- Repeat with the other egg and another tablespoon of flour. Beat until fully combined, taking care to scrape the edges of the bowl.
5- Fold in your chocolate extract, cocoa powder alongside the remainder of your flour. I always use two teaspoons of liquid chocolate extract when I make any kind of chocolate sponge. It helps to stop the cocoa powder catching as the cake cooks and gives it a delicious rich flavour whilst helping the cake stay moist even if you do accidentally leave it the oven a couple of minutes longer than you should.
6- Spoon your mixture into your waiting cupcake cases and bake for 18-20 minutes or until the top springs back when pressed gently. Leave to cool in the tin for five minutes before transferring to a wire cooling rack to cool completely.
7- Now it's time to start your buttercream. Place your softened unsalted butter into a clean bowl and beat until soft.
8- Sieve in half your icing sugar and beat until combined. If you're using a hand mixer to make your buttercream, start on a slow speed so your icing sugar doesn't fly everywhere because it coats everything and doesn't taste as good as it suggests.
9- Sieve in the remaining half of your icing sugar and beat until fully combined, taking care to scrape the edges and bottom of the bowl so everything is fully incorporated.
10- Beat in your vanilla extract and a small splash of milk to help loosen the mixture and take it to the perfect piping consistency.
11- Spoon your prepared buttercream into a piping bag fitted with a piping nozzle of your choice and pipe onto your now cooled cupcakes. I used my 2D Flower nozzle to create these swirls as it always works wonders with my shaky, still somewhat amateur piping hands.
12- Once all of your cupcakes have been decorated, gently place your mini eggs in the centre to create a small cluster. You can use four or even five but I used only three to keep it looking cleaner and simpler but still ridiculously tasty.
13- Leave to set and then enjoy. I can guarantee these will be a hit with family, friends and work colleagues.

Monday, 7 October 2019

Recipe: Mini Spiderweb Bites With Marshmallow Buttercream

Happy Monday! I hope you all had a great weekend. Today I'm back with another Halloween themed bake that will work perfectly for any parties or nights in you may have planned over the spooky season. They may be small in size but they're packed with a mixture of melt in the mouth white and milk chocolate chips topped off with a marshmallow buttercream which will give anyone a sweet tooth.

Ingredients 
For The Cakes 
- 100g Caster Sugar
- 100g Stork/Margarine
- 100g Self Raising Flour
- 2 Eggs
- 25g Cocoa Powder
- 50g Milk Chocolate Chips
- 50g White Chocolate Chips

For The Buttercream
- 170g Unsalted Butter, softened
- 256g Icing Sugar
- 3 Tsp Double Cream
- 1 Tsp Vanilla Extract
- 1 Jar Of Fluff
- Rice Paper Spiderweb Decorations

Method 
1- Pre heat oven to 180C. Line a twelve hole muffin tin with paper cases.
2- Into a bowl place your caster sugar and stork. Using either a stand mixer or silicone spatula/wooden spoon, cream together until pale in colour and smooth in texture.
3- Add one egg and a tablespoon of flour. Beat until fully combined.
4- Repeat with the second egg and another tablespoon of flour. Beat again until combined, taking time to scrape any mixture off the sides of the bowl.
5- Fold in the rest of your flour alongside the cocoa powder. Folding in the flour helps to keep any air you've already built into the mixture. I find it helps to create a lighter, tastier cake.
6- Fold in your chocolate chips and then spoon into the paper cases.
7- Bake for 15 minutes or until a skewer comes out clean. Usually I bake this kind of recipe for longer but as they are smaller in size they take less time to bake. You also don't want to overbake them as the cocoa in the mixture will dry them out and make them heavy and dry when you eat them.
8- Leave to cool in the tin for five minutes and then transfer to a wire cooling rack to cool completely.
9- Now it's time for the icing. I've used this recipe before and I honestly don't know why I thought it would be a good idea to use it as my frosting for this recipe. Sure it's delicious but the Fluff gets absolutely everywhere no matter how careful you are with it.
10- Place the softened unsalted butter into a bowl and beat until it's soft, light and creamy. A stand mixer or an electric hand mixer is perfect for this as it can take a while.
11- Once you've got the right consistency, sift your icing sugar into the bowl and beat until smooth. I made sure to scrape around the sides of the bowl as I did this so no lumps were left sat on the side.
12- When all of your icing sugar has been added and the mixture is smooth, add your teaspoon of vanilla extract and the three teaspoons of double cream. Beat again until the mixture is smooth and everything is fully incorporated.
13- Now comes the fun part. Spoon the entire jar of Fluff into the buttercream mix and beat until fully incorporated. Do not get this stuff over your clothes, it will dry instantly and be a right cow to get rid of.
14- Once you're happy with your buttercream, spoon into a piping bag and gently pipe it onto the top of your mini morsels. I found I needed a really steady hand for this and that I did over ice quite a few of them as I thought I was icing a bigger cupcake.
15- When you've iced all of your mini morsels, pop the rice paper cobwebs in at an angle and leave them to set. These may take a little longer to set as the Fluff makes the buttercream quite sticky but they will set in the end.
16- Then all that's left is to enjoy them. I'm sure if you make them for any spooky related gatherings, they'll go down a treat. I know mine did.

Friday, 4 October 2019

Recipe: Nightmare Before Christmas Shortbread

Happy Friday!! If you don't know or couldn't tell from previous posts or my social media accounts, one of my favourite films ever is Nightmare Before Christmas. There aren't enough words to describe just how much I love it. And this year I wanted to incorporate it into my Halloween bakes which is where Etsy came very much in handy. I managed to find these amazing and decently priced cookie cutters on there. So today we have a simple shortbread recipe with a spooky twist, a brilliant recipe for any fans of Nightmare Before Christmas or Tim Burton.

Ingredients 
115g Butter
55g Caster Sugar
A Pinch Of Salt
175g Plain Flour

Method 
1- Pre heat oven to 180C. Line a large baking tray or two small baking trays with baking parchment.
2- In a bowl place your flour, sugar and salt.
3- Add the butter and rub in with your fingers until the mixture resembles breadcrumbs.
4- Keep rubbing together until it starts to form a dough. Add a little water if necessary to get the dough to stick together. Don't overwork the dough though, you want it still have that slight crumbliness to it that makes the shortbread that little softer in texture.
5- Once you have your dough, place on a lightly floured surface and roll out until a 1/2inch thick. Make sure you keep your rolling pin floured as the dough may stick to it once you've rolled it a few times.

6- Then comes the fun bit. Choose your first character and press the cutter firmly into the dough. I say firmly as you want it to actually imprint onto the dough but not to stick to the dough so it's ruined when you pull the cutter away.
7- Repeat with each of your characters, rerolling the dough each time until you have your desired amount. As the cutters I used are quite large I only managed to get two of each character out but that still gave me a good twelve pieces of shortbread.
8- Once you've filled your baking tray/s place them in the oven for 10-15 minutes or until the edges are golden and the middles still a little soft. They'll soon firm up as they cool but you don't want to leave them in too long otherwise they'll catch and burn.
9- When they're cooked leave to cool on the tray for a few minutes before transferring to a wire cooling rack to cool completely. Or you could wait a few minutes and taste test one for yourself like I did.
10- All that's left then is to enjoy them. And trust me when I say one won't be enough and before you know it, you're entire batch will be gone.

Monday, 19 August 2019

Recipe: Salted Caramel Cupcakes

Back in June my mum's work held a cake sale in aid of charity. And I was eager to be a part of it. So in the full midst of a busy week at work I bashed out three delicious batches of cupcakes that turned the best I'd ever made them. I actually shared the Rhubarb And Custard Cupcakes recently and today I'm back with the Salted Caramel Cupcakes that could have turned out a disaster but in fact turned out better than expected.

Ingredients
For The Cupcakes
- 100g Stork
- 100g Caster Sugar
- 100g Self Raising Flour
- 2 Eggs
- 25g Cocoa Powder


For The Buttercream
- 200g Butter, softened
- 320g Icing Sugar
- 2 Tsps Salted Caramel Extract
- Blue Food Colouring (optional)

Method 
1- Pre heat oven to 180C. Line a twelve hole muffin tin with paper cases.
2- Into a bowl place your stork and sugar. Using a stand mixer or silicone spatula beat until pale and fluffy. A stand mixer is a lot easier and quicker but mixing it by hand gives the cakes a lighter texture that just melts in the mouth.
3- Add one egg and a tablespoon of flour. Beat until combined.
4- Repeat with the second egg and another tablespoon of flour. Make sure you scrape around the edges of your bowl so no butter or egg is sat lingering on the sides.
5- Fold in the rest of your flour and cocoa powder. This is the one part of the recipe where you need to take your time. Just beating the flour in relentlessly will knock out all the air you've already built in the mixture. Folding the flour in will add more air and means your cake won't sink when it's cooking.
6- Spoon your mixture into the paper cases and cook for 20 minutes or until a skewer comes out clean. I tend to be more cautious when cooking cupcakes with cocoa powder in them as they tend to dry out if you leave them in for too long and you lose that delicious chocolate flavour you're aiming for.
7- Leave to cool for five minutes in the tin once cooked and then transfer over to a wire cooling rack to cool completely.
8- Now it's onto the buttercream. Place your softened (not melted) butter into a clean bowl and beat until soft and creamy.
9- Add half your icing sugar and beat until combined. Again you can do this by hand or by a stand mixer but to save time I always do it by hand as it saves me having to drag my mixer out.
10- Add the other half of your icing sugar and beat until combined. If your buttercream is a little stiff, add a splash of milk to loosen it to a good piping consistency.
11- Pop in your salted caramel extract and beat again. I always sneak a bit of the buttercream to see how it tastes afterwards so I know if I need to add more.
12- Then this next step is optional. I wanted my cakes to be bright and noticeable on the stand so I added bright blue food colouring to make them pop. You don't have to but if you want to add a twist or make them stand out then food colouring is the way to go. I do advise really taking your time to mix your food colouring in. The last thing you want is a swirl of unmixed food colouring sat on top of your cupcake.
13- Then it's time to pipe the buttecream onto your now cooled cupcakes. I usually use my Wilton 2D Flower piping nozzle but it was currently in the wash so I went in with a slightly larger nozzle that gave a more open design. My hand always tends to get shaky when I pipe so they're not as neat as others and by the time I was icing this I had already iced twenty four cupcakes that night.
14- Once you're happy with your icing, leave to set and then enjoy. Trust me when I say everyone will enjoy them.  

Saturday, 10 August 2019

Recipe: Lemon And Lime Cupcakes

Last year I made Lemon And Lime Cupcakes. Looking back on them and how far I've come as a baker, they're not my best work. So today I'm back with my new and improved recipe for Lemon And Lime Cupcakes.

Ingredients
For The Cakes 
- 100g Caster Sugar
- 100g Self Raising Flour
- 100g Stork/Margarine
- 2 Eggs
- 2 Tsps Lemon Extract

For The Icing
- 200g Butter
- 320g Icing Sugar
- Zest Of Half A Lime
- Juice Of Half A Lime

Method
1- Pre heat over to 180C. Line a twelve hole muffin tin with paper cases.
2- In a bowl place the Stork and the caster sugar. Beat until fluffy and pale in colour.
3- Add one egg and a tablespoon of flour. Beat until fully combined. Don't worry if the mixture looks a little runny at this point, it'll soon thicken up when you add more flour.
4- Repeat with the other egg and another tablespoon of flour. Beat until fully combined, taking care to scrape the edges of the bowl.
5- Fold in the rest of the flour and the lemon extract. Now is the only time in this recipe that you have to be gentle. Beating the mixture too quickly will knock out all the air that you've already built up.
6- Spoon into the paper cases and cook for 20-22 minutes or until skewer comes out clean. Leave to cool for five minutes in the tin then transfer to a wire cooling rack to cool completely.
7- For the icing, place the softened butter into a bowl and beat until smooth and creamy.
8- Add half the icing sugar and beat until fully combined. Don't worry if you don't sieve the icing sugar, I never do and I never end up with lumps in my buttercream.
9- Add the rest of your icing and beat until everything is fully incorporated.
10- Beat in the lime zest and lime juice. If your buttercream is a little stiff, now is the time to add a splash of milk to get it to the perfect piping consistency.
11- Now the food colouring is optional. You don't have to add and keep it the basic buttercream colour but if you want to give them a pop then food colourings the way to go. I originally planned on going for a pale lime green shade but these turned out more like highlighter green. Make sure that all the food colouring is beaten into the mix before you pipe the icing as you don't want a random burst of colour on your cake.
12- Now it's time to ice your cakes. You can use any piping nozzle you like but I always go for my trusty 2D Flower Nozzle. It gives a lot more control to the icing than a thinner nozzle and I love the easy swirl design.
13- Once you've iced your cupcakes, let them set and then enjoy with family, friends or in my case work colleagues. 

Monday, 5 August 2019

Recipe: Victoria Sponge With Fresh Strawberries And Buttercream

One of my absolute favourite cakes is a good old Victoria Sponge cake. Sure it's basic but it's timeless and never fails to taste delicious. And this week just gone, I wanted to make something delicious yet quick for when my nan visited. So I cracked out the classic sponge recipe but changed out the jam filling for fresh strawberries alongside a sweet yet not overpowering vanilla buttercream.

Ingredients
For The Cake
- 200g Caster Sugar
- 200g Self Raising Flour
- 200g Stork/Margarine
- 4 Eggs
- 1 Tsp Of Vanilla Extract

For The Icing 
- 250g Butter
- 320g Icing Sugar
- 1 Tsp Of Vanilla Extract
- Fresh Strawberries

Method
1- Pre heat over to 180C. Line two 19cm cake tins with greaseproof paper.
2- Place the sugar and Stork into a bowl. Beat until creamy and pale in colour. This can be done with either a wooden spoon/spatula or a stand mixer. By hand requires more elbow work but creates a lighter cake that just melts in the mouth.
3- Add one egg and a spoonful of flour. Beat until fully combined.
4- Repeat with your remaining eggs, adding a spoonful flour after each egg. Beat until everything is completely incorporated. Make sure to scrape around the edges so that nothing is left sitting around the sides.
5- Fold in the rest of your flour and your vanilla extract. The key here is to fold the flour in. Sure it's tempting to beat it in quickly but it'll give you a flat, dense cake that is chewy and lacks that lightness you're looking for.
6- Divide the mixture between your two prepared tins and cook for 20-22 minutes or until a skewer comes out clean. With a Victoria Sponge it's easy to tell when it's cooked as it'll bounce back quickly when you press gently onto it's top. Leave to cool in the tin for five minutes then transfer to a wire cooling rack to cool completely.
7- Now it's time to make your icing. Place your softened butter into a bowl and beat until smooth and creamy.
8- Add half your icing sugar and beat until fully incorporated. It is usually advised to sieve your icing sugar but I am a bit of a lazy baker so I don't bother sieving. A good beat by hand or stand mixer will soon beat out any lumps in your icing sugar.
9- Beat in the remaining icing sugar. If you find that your buttercream is slightly too stiff to pipe, add a splash of milk and you'll have the perfect consistency to pipe onto your cake.
10- Take one of your cooled cakes and pipe half of your buttercream onto it. Using a palette knife, gently spread it until the cake is evenly covered. It doesn't matter if it's perfect, it's going to get eaten anyway.
11- Cut your strawberries in half and press gently into your buttercream. You can just put them around the edge to add some colour to your cake or you can place them all over like I did.
12- Layer your last cake on top of the newly decorated base. Take your remaining buttercream and pipe a fancy looking design along the top. I went with the simple droplet style on the top as I had plenty of buttercream left to cover it's entirety.
13- Now popping a strawberry on the top is optional but I feel it just finishes off the cake as a whole. Then all that's left for you to do is enjoy.

Friday, 2 August 2019

Recipe: Lemon And Poppyseed Muffins

When I was picking recipes to bake for the month of August, I hit a brick wall. I'm a baker who likes to try and bake somewhat seasonally appropriate recipes but for the life of me I could think of nothing for August. Then I was hit by one recipe that I tried last year but thought of a more elaborate version for this year and from there I decided to dip my toe into a couple that I'd never thought to try before. The first is this delicious Lemon and Poppyseed recipe that I wasn't sure I was going to like but knew my friends and family would love. But surprisngly I fell in love with the end result as soon as I tasted them. Light with a gorgeous tang of lemon running through that isn't too overpowering partnered with the slight crunch of the poppyseeds and you've got yourself a delicious summer bake that everyone will adore.

Ingredients 
225g Self Raising Flour
175g Golden Caster Sugar
175g Butter, melted and cooled slightly
3 Eggs
100g Natural Yoghurt
Zest Of 2 Lemons
1 Tbsp Poppyseeds

Method 
1- Pre heat your over to 180C and line a twelve hole muffin tin with paper cases.
2- Into a bowl mix your flour, sugar, lemon zest and poppy seeds.
3- Into a seperate bowl mix together your natural yoghurt and eggs. I like to really beat them together so that they're fully combined.
4- Pour the natural yoghurt/egg concoction and melted butter into your dry ingredients. Your butter must be slightly cooled by this point as warm butter will curdle the natural and ruin the recipe. I'd advise intially melting your butter after you've lined your tin with cases. That gives it time to cool as your prepare the rest of your ingredients.
5- Mix together with a wooden spoon or spatula until all the lumps have dissovled. Don't worry if your mixture seems runny, it's just a combination of the melted butter, eggs and natural yoghurt loosening up what would normally be a stiffer mixture.
6- Spoon the mixture evenly into the paper cases and bake for 20-22 minutes or until a skewer comes out clean.
7- Leave to cool in the tin for five minutes before transferring to a wire cooling rack to cool completely.
8- Then all that's left is to enjoy them. This have a storage life of around three days so they're perfect for a girls night in, coffee morning or a sweet treat for those you work with.

Tuesday, 23 April 2019

Recipe: Chocolate Peanut M&M Cookies

I love peanut M&M's and brought a pouch of them a couple of months back intent on creating some sort of recipe with them. And then I completely forgot about them, until I ran out of Mini Eggs to squeeze in one last Easter recipe and couldn't find any anywhere. That's when I remembered I had these. Pair that with my urge to make cookies, it turned out to be a match made in heaven. With these cookies you get that delicious chocolately goodness that has a nutty, crunch in every other bite. I'd like to say that I really enjoyed making these but considering my stand mixer broke halfway through and I'm still waiting to hear back about my warranty, I have to say there have been many more recipes I've enjoyed making more.

Ingredients 
- 150g Salted Butter, softened
- 80g Light Brown Muscavado Sugar
- 80g Granulated Sugar
- 2 Tsp Vanilla Extract
- 1 Egg
- 225g Plain Flour
- 30g Cocoa Powder
- 1/2 Tsp Bicarbonate Of Soda
- 1/4 Tsp Salt
- 140g Peanut M&M's

Method 
1- Pre heat your oven to 180C. Line several baking trays with greaseproof paper/baking parchment.
2- Into a bowl place the softened butter, granulated and muscavado sugar. Beat until smooth and creamy, taking care to beat out any lumps of sugar as you go.
3- Add your vanilla extract and egg then beat again. I always take this point as an opportunity to scrape around the sides of the bowl so you don't have any mixture unincorporated.
4- Sieve the cocoa powder, bicarbonate of soda, salt and plain flour into the bowl. If you're using a stand mixer I always advise taking the bowl off for this part. It saves a lot of time and hassle and you should hopefully have less to clear up afterwards.
5- Beat everything until completely combined. It may look like it's not going to become anything but just give it time and you'll end up with a delicious looking cookie dough that you'll want to eat before you even cook it.
6- Add your M&M's and beat again until they're fully incorporated.
7- Now it's time to shape your cookies. There are two ways you can go about doing this, firstly you can do it with your hands but it's gets very sticky very quickly. Or secondly you could use a batter scoop to scoop out an equal amount of dough so that your cookies may not all end up being circular, they will be all the same size. Evenly place your balls of cookie dough on the trays so they have room to drop and expand as they cook.
8- Once you've filled your trays; usually around three for me, pop them in the oven and bake for 10-15 minutes or until the edges are slightly firm. I recommend keeping a firm eye on these ones particuarly as cocoa powder tends to make them cook quicker and the slightest bit of overcooking them will make them a little dry.
9- Once they're cooked, leave to firm up on the trays then transfer to cool completely on a wire cooling rack.
10- Now enjoy. You can easily enjoy them when they're still warm or have a little more patience than me and wait for them to cool completely before devouring them all.

Wednesday, 17 April 2019

Recipe: Easter Shortbread

I absolutely love shortbread. I used to mostly eat it around Christmas when it's in every shop you look in but now since I've realised I can make my own that tastes almost as good as shop brought, I can't stop making it. And today I'm back with my Easter Shortbread Recipe which is essentially a basic shortbread recipe shaped like bunnies but they looked cute and I couldn't resist sharing them.

Ingredients 
- 115g Butter
- 55g Caster Sugar
- A Pinch Of Salt
- 175g Plain Flour

Method
1- Pre heat oven to 180C. Line two baking trays with baking paper.
2- In a bowl place your flour, sugar and salt.
3- Add your butter and rub together until the mixture resembles breadcrumbs. This doesn't take as long as you expect but if you want to make it quicker, you can easily put this all together in a food processor and blitz it together.
4- Continue to rub together until it forms a dough. This won't take long but if you do find your dough breaking or not coming together at all, add a little water or milk as a binding agent. However don't add too much or your dough will be wet and again won't come together easily.
5- Once you have your dough, place it on a lightly floured surface and roll it out until it's a 1/2 inch thick. Take care to flour your rolling pin as well as it might stick to the dough and you'll end up tearing a hole out of it as your rolling it out.
6- When you're happy with the thickness of your dough, take your bunnyshaped cutters and cut out as many shapes as you can, rerolling your dough when necessary to get the most out of it.
7- Place your shapes onto your prepared baking tray and bake for 10-15 minutes or until they're golden brown. When you take them out, you want the edges to be firm but the inside to still be a little soft, they'll soon firm up as they cool and you'll end up with delicious melt in the mouth shortbread.